Getting Started With Metasploit On Kali Linux

Metaspolit is a very powerful tool that will allow you to exploit certain vulnerabilities within target machines. It comes already installed on Kali Linux, but there’s a few things you need to do at the command line before you can get started.

PREREQUISITES

  1. You should have a Linux Live drive boot already
  2. You should have a connection to a LAN or WAN
  3. Know the IP address range of the network you are targeting

In this tutorial we will be exploiting the afp module for a macintosh computer running on our LAN. We will use the afp_server_info module in metasploit to find out more details about our target machine.

STEP 1
The first step is to find out information about our target network. Run an arp scan on the network you are targeting. with the following command
arp-scan 192.168.0.1/24
You can change the IP address range to match the network you wish to scan. After running this you will be presented with all the devices connected to the network.
01_arpScan
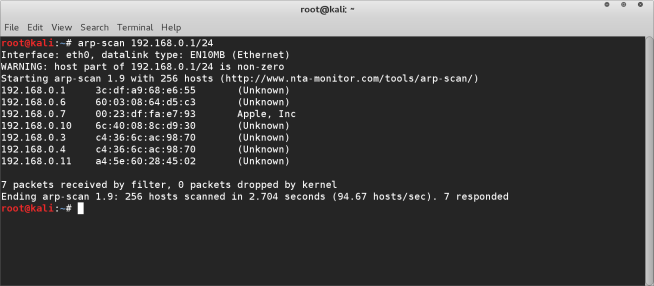
You can see that we have several devices connected to our network.

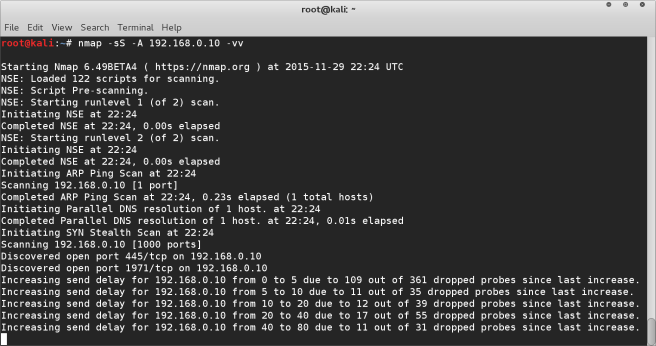
Next we will find out what services and ports are open on which machines using nmap :-
nmap -sS -A 192.168.0.1/24 -v
02_nmapScan

After running this scan you will be able to look at the results and identify the IP address of a machine that has several open ports. These open ports are what we will use to exploit, so the more ports a specific machine has open the better. Once you have identified this we will run one final scan on the specific target machine :-
nmap -sS -A 192.168.0.10 -vv
03_nmapTarget

STEP 2
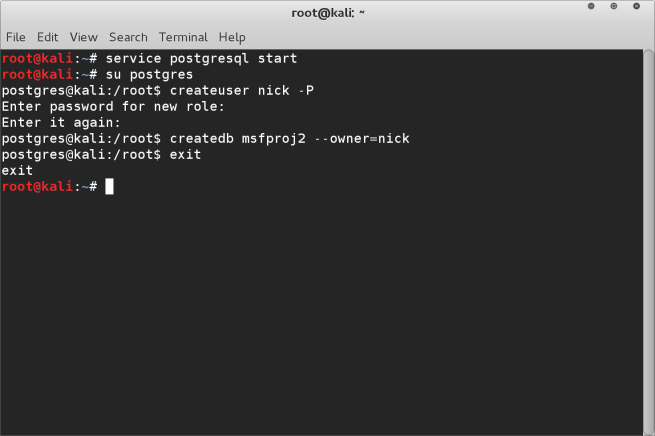
Now we have identified our target machine we can setup our database which will be used by metasploit. Open up a new terminal window and run the following :-
service postgresql start
su postgres
createuser nick -P
createdb msfproj2 –owner=nick
exit
(choose your own username and database name and password)
04_setupDB

STEP 3
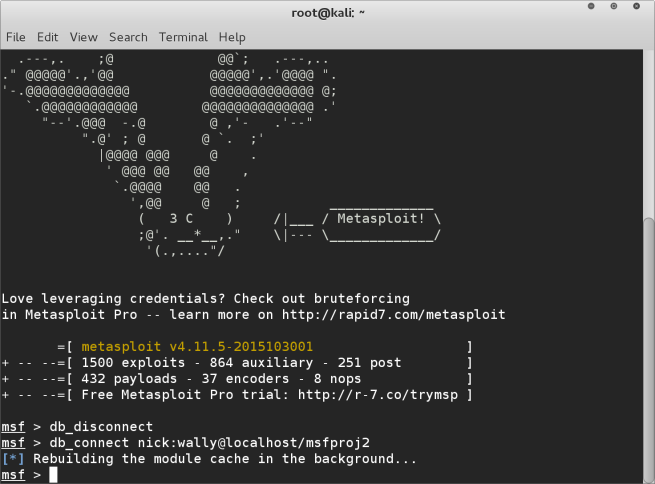
Now we are ready to start the metasploit program by running the msfconsole command
05_startMsfconsole

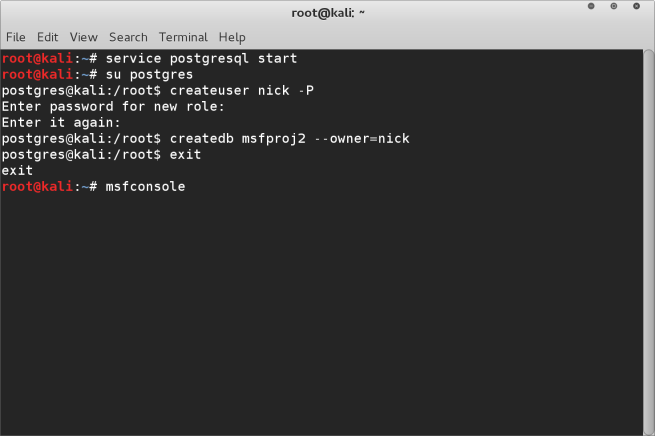
Once msfconsole is loaded, we need to connect to the database we just created.
db_disconnect
db_connect nick:<your password>@localhost/<your db name>
06_dbConnect

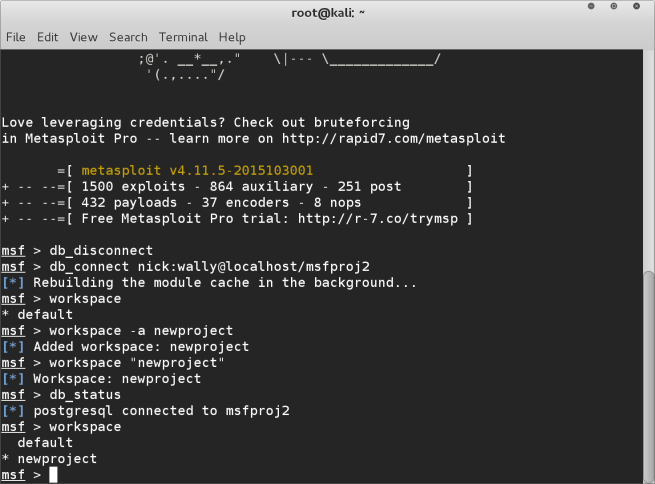
Now we need to setup a new workspace.
workspace -a newproject
workspace “newproject”

To check that everything is setup properly run :-
db_status
workspace

The results of these two commands should show that your postgresql is connected to the correct database.
07_testSetup

STEP 4
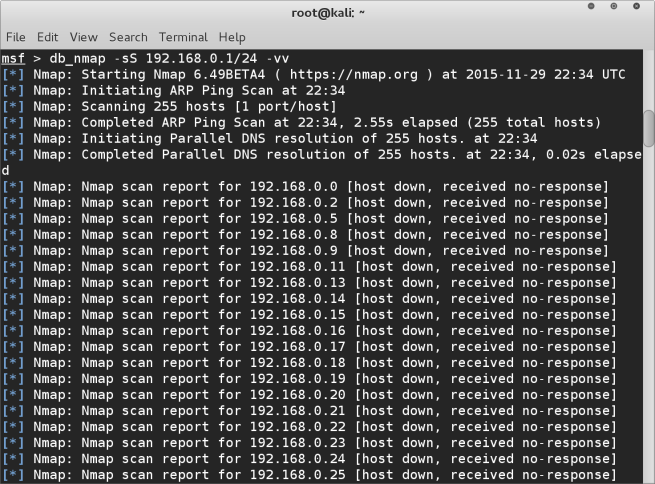
Now we have metaspoilt setup and connected to our database we can run nmap again on our target network, but this time it will write the results to be saved into the database :-
db_nmap -sS 192.168.0.1/24 -vv
08_nmapScanDb
09_nmapScanComplete

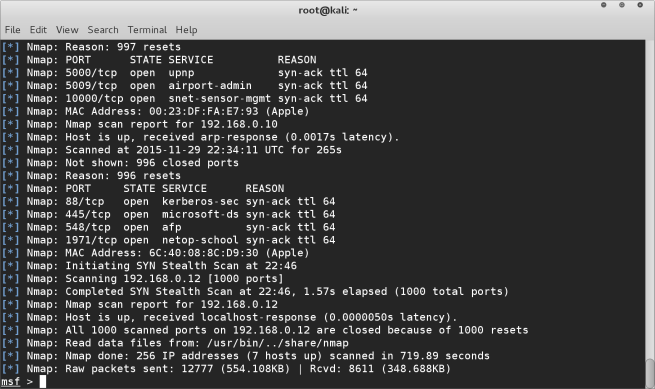
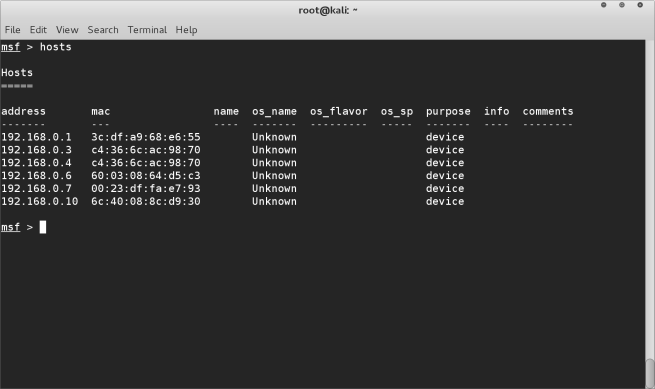
Once the scan is complete we can run the command hosts to be shown a list of devices connected to the network.
10_hostList

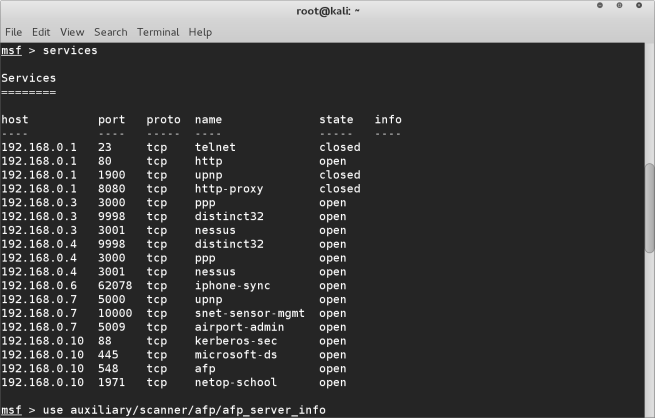
the services command will display all the services that are running on the network which we can exploit. When you find a service you want to exploit, you can check if metaspoilt has any exploits for this service by using the search <service name> command
11_servicesListSearch

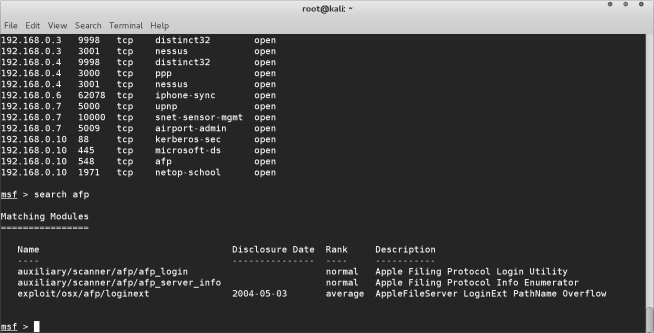
In this case we have identified the afp service that we wish to exploit. There are several modules for afp that we can use.  We are going to do a very basic “attack” to gain more information about the computer on the network.
use auxiliary/scanner/afp/afp_server_info
01_afpServices

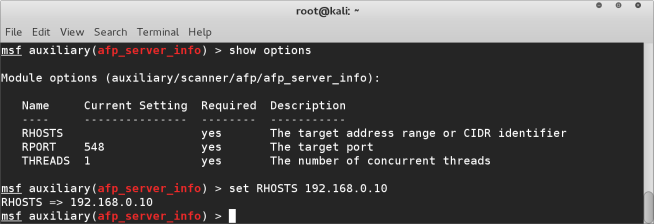
after loading this module, we need to view the options. show options  command will do this for us. You can see that it also lists which of these options are mandatory under the “required” column. In the case of the afp_server_info module all options are required. Two are already filled in by default. Check that the port matches the port that was listed under the services list. If this is already setup OK, we only ned to add RHOSTS which will be the IP address of the target machine, of a range of IP addresses. We are targeting machine 192.168.0.10 so we will run the command set RHOSTS 192.168.0.10
02_afpOptions

We are now finally ready to run the module, simply use the command run or exploit and the module will run giving it’s results as shown below.
03_capture

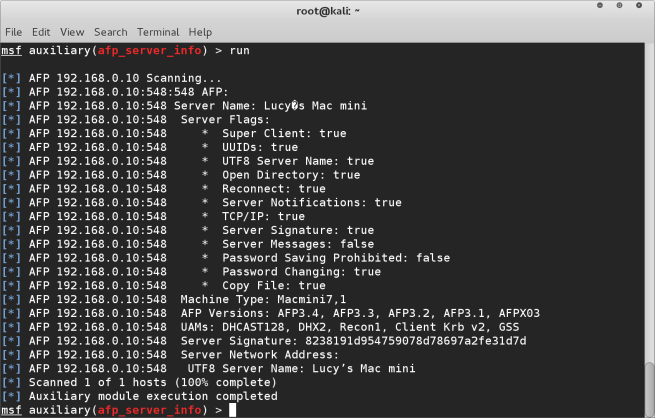
The above shows details about our target machine, it’s network/server name, the type of machine etc. This information can be useful for us when planning further penetration attacks on this machine.

SUMMARY
So that’s a very brief and basic introduction to metasploit framework. It covers just a fraction of what this very powerful program is capable of doing. In later tutorials we will be going deeper into metasploit and what it can do. In the next tutorial we will be doing another function with the afp exploit to crack the password for the user.

How To Enable Wireless Monitoring Macbook Pro

One headache people often come across when setting up wireless cards on their macbook with Linux apart from actually getting it working (see this post for help on that) is enabling monitoring mode.

By default the broadcom drivers don’t allow the wireless network card in the macbook (and I assume other Mac variants) to be put into monitor mode. This is particularly frustrating when you need to run airodump-ng for example to capture wireless packets.

There is however a solution for this that I have discovered, you simply need to execute the following command at the terminal

echo 1 | sudo tee /proc/brcm_monitor0

After this if you run the ifconfig command you will see a new wireless device is listed prism0. This is your monitoring device for your wireless card. So when you run airodump-ng for example, rather than using mon0 as the interface you will substitute it for prism0

prism0

To test this is working run airodump-ng prism0 command in the terminal. You should then see the wireless networks and the packets being collected like this :-

airodumpCapture

And there you have it, your broadcom wireless card on a macbook pro 2014 model up and running with monitor mode enabled. Enjoy!

Note, you will need to run this terminal command to setup prism0 after each reboot, even with persistence enabled.

Kali Linux Broadcom Wireless on Macbook

After setting up your Kali Linux USB Live Drive with persistence, there’s one final step that usually provides a major headache for Mac users, the Wifi. It took me many many hours of searching and trying different things and learning to come up with a concrete solution, like a detective piecing together the threads of information I could find.

One big drawback it seemed was that those who had managed to get things working weren’t able to put the WiFi into monitor mode, effectively making airodump-ng and other Wireless cracking/hacking tools useless, as you could not monitor and collect packets of data from the WiFi traffic.

Thankfully though I was able to find the solution for this as well.

This is confirmed as working 100% on my Macbook Pro (Mid 2014 model). The model you have of Macbook (or Mac Mini or macbook air etc) will determine exactly what broadcom chipset you have. You can find out what exact chipset you have by using the lspci command at the terminal window. You will get a list of all pci devices connected to your system. Look in the list to find your broadcom device. On my mid 2014 model Macbook Pro the device is BCM4360

hardware

STEP 1

  • First you need to boot up into your Kali Linux Live Drive with persistence turns on and configured correctly (otherwise you will need to do this procedure overtime you boot up if you don’t have persistence configured correctly). Also you are going to need internet access, so you will have to most probably plug in a thunderbolt Ethernet adapter so you can gain access online during this procedure.
  • If you run the ifconfig and ifconfig commands in your linux terminal you will see only your ethernet and loopback devices listed, no wireless Lan.
    before
  • In terminal run the following commands to update your Linux installation
    • sudo apt-get update
      update
    • apt-get install linux-headers-$(uname -r | sed ‘s,[^-]*-[^-]*-,,’) broadcom-sta-dkms
      broadcom
  • After the above two commands have run (they take a few minutes each to complete, as the updates need to be downloaded and installed) you will need to run the following commands to remove the possibly conflicting drivers which come with Debian.
    • mod probe -r b44 b43 b43legacy ssd brcmsmac
  • After this you are good to go with he following command
    • mod probe wl
  • Now if you run the ifconfig and iwconfig you should see the wireless card is now listed
    after
  • Open up the network settings of Kali Linux and you should find you are now able to connect to wireless networks. Once connected, disconnect your ethernet cable and run the following in terminal
    • ping google.com
  • If the ping returns are good then your wireless connecting is working!

STEP 2

  • That’s just the beginning, now you have this working but you will not be able to switch the wireless adapter into monitor mode when trying to perform any wireless cracking techniques. If you try putting the wlan0 device into monitor mode it fails like this.
    airmonFail
  • This was one of the most difficult parts to puzzle out but here is the correct working method. You will need to run this command EVERY TIME you reboot, I haven’t figured out yet how to make this persistent.
  • In terminal type the following :-
    • echo 1 | sudo tee /proc/brcm_monitor0
  • This will now create a new wireless interface called prism0 which you can see if you run the iwconfig command in terminal. It is the prism0 adapter that you will be using for your wireless attacks as it has monitor mode enabled.
    prism0
  • Now, there’s no need to run airmon-ng, the prism0 device is already your monitoring wireless lan. You can run airodump-ng to test that everything is working properly
    • airodump-ng prism0
      airodumpCapture