How To Enable Wireless Monitoring Macbook Pro

One headache people often come across when setting up wireless cards on their macbook with Linux apart from actually getting it working (see this post for help on that) is enabling monitoring mode.

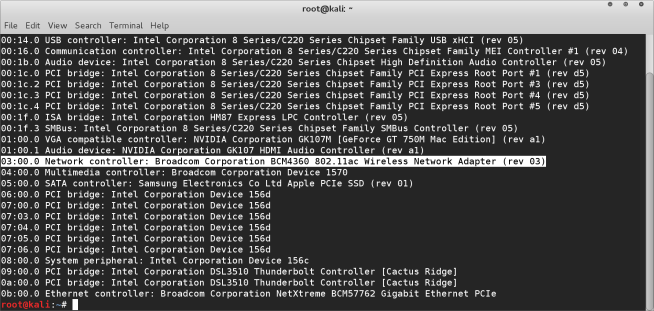
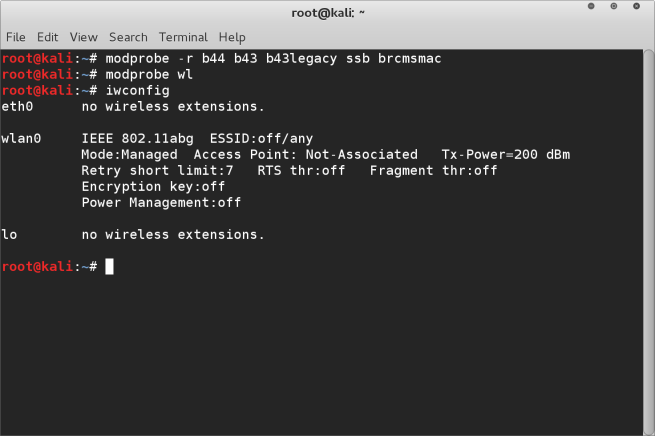
By default the broadcom drivers don’t allow the wireless network card in the macbook (and I assume other Mac variants) to be put into monitor mode. This is particularly frustrating when you need to run airodump-ng for example to capture wireless packets.

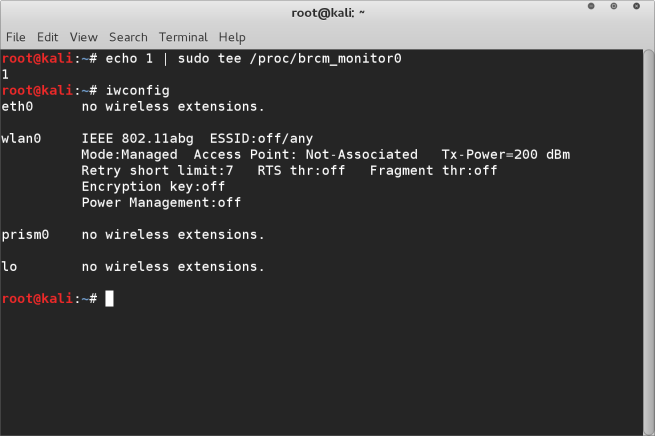
There is however a solution for this that I have discovered, you simply need to execute the following command at the terminal

echo 1 | sudo tee /proc/brcm_monitor0

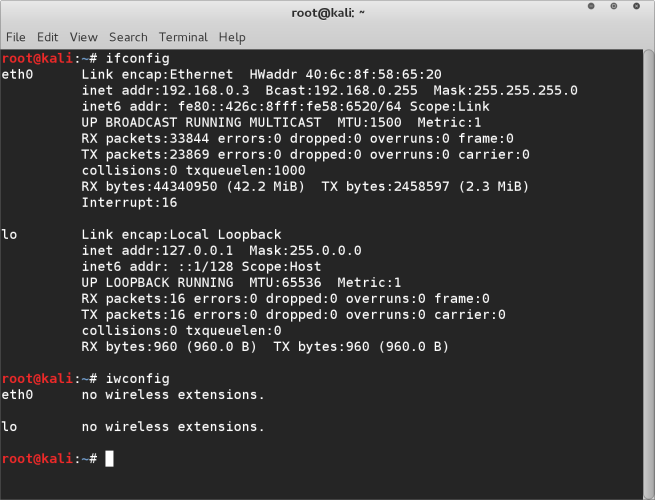
After this if you run the ifconfig command you will see a new wireless device is listed prism0. This is your monitoring device for your wireless card. So when you run airodump-ng for example, rather than using mon0 as the interface you will substitute it for prism0

prism0

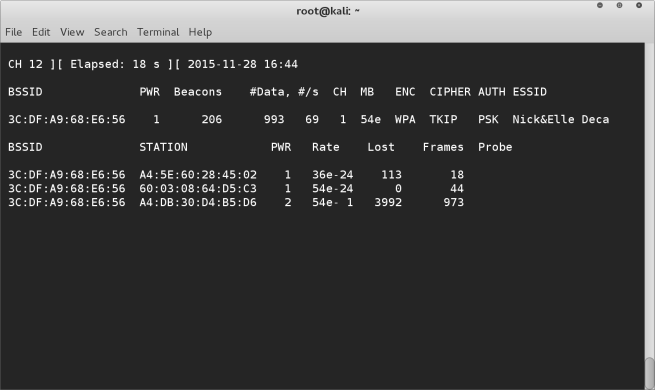
To test this is working run airodump-ng prism0 command in the terminal. You should then see the wireless networks and the packets being collected like this :-

airodumpCapture

And there you have it, your broadcom wireless card on a macbook pro 2014 model up and running with monitor mode enabled. Enjoy!

Note, you will need to run this terminal command to setup prism0 after each reboot, even with persistence enabled.

Kali Linux Broadcom Wireless on Macbook

After setting up your Kali Linux USB Live Drive with persistence, there’s one final step that usually provides a major headache for Mac users, the Wifi. It took me many many hours of searching and trying different things and learning to come up with a concrete solution, like a detective piecing together the threads of information I could find.

One big drawback it seemed was that those who had managed to get things working weren’t able to put the WiFi into monitor mode, effectively making airodump-ng and other Wireless cracking/hacking tools useless, as you could not monitor and collect packets of data from the WiFi traffic.

Thankfully though I was able to find the solution for this as well.

This is confirmed as working 100% on my Macbook Pro (Mid 2014 model). The model you have of Macbook (or Mac Mini or macbook air etc) will determine exactly what broadcom chipset you have. You can find out what exact chipset you have by using the lspci command at the terminal window. You will get a list of all pci devices connected to your system. Look in the list to find your broadcom device. On my mid 2014 model Macbook Pro the device is BCM4360

hardware

STEP 1

  • First you need to boot up into your Kali Linux Live Drive with persistence turns on and configured correctly (otherwise you will need to do this procedure overtime you boot up if you don’t have persistence configured correctly). Also you are going to need internet access, so you will have to most probably plug in a thunderbolt Ethernet adapter so you can gain access online during this procedure.
  • If you run the ifconfig and ifconfig commands in your linux terminal you will see only your ethernet and loopback devices listed, no wireless Lan.
    before
  • In terminal run the following commands to update your Linux installation
    • sudo apt-get update
      update
    • apt-get install linux-headers-$(uname -r | sed ‘s,[^-]*-[^-]*-,,’) broadcom-sta-dkms
      broadcom
  • After the above two commands have run (they take a few minutes each to complete, as the updates need to be downloaded and installed) you will need to run the following commands to remove the possibly conflicting drivers which come with Debian.
    • mod probe -r b44 b43 b43legacy ssd brcmsmac
  • After this you are good to go with he following command
    • mod probe wl
  • Now if you run the ifconfig and iwconfig you should see the wireless card is now listed
    after
  • Open up the network settings of Kali Linux and you should find you are now able to connect to wireless networks. Once connected, disconnect your ethernet cable and run the following in terminal
    • ping google.com
  • If the ping returns are good then your wireless connecting is working!

STEP 2

  • That’s just the beginning, now you have this working but you will not be able to switch the wireless adapter into monitor mode when trying to perform any wireless cracking techniques. If you try putting the wlan0 device into monitor mode it fails like this.
    airmonFail
  • This was one of the most difficult parts to puzzle out but here is the correct working method. You will need to run this command EVERY TIME you reboot, I haven’t figured out yet how to make this persistent.
  • In terminal type the following :-
    • echo 1 | sudo tee /proc/brcm_monitor0
  • This will now create a new wireless interface called prism0 which you can see if you run the iwconfig command in terminal. It is the prism0 adapter that you will be using for your wireless attacks as it has monitor mode enabled.
    prism0
  • Now, there’s no need to run airmon-ng, the prism0 device is already your monitoring wireless lan. You can run airodump-ng to test that everything is working properly
    • airodump-ng prism0
      airodumpCapture